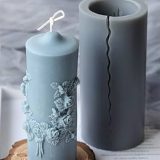
Creating your candles is a rewarding hobby, and making your molds opens up a world of possibilities for shapes and sizes. Silicone molds are particularly popular due to their flexibility and ease of use. Are you interested to know how to make candle molds with silicone ? Let’s get started.
How to make candle molds with silicone?
Now we’ll explain step by step making candle molds with silicone:
Preparation
- Workspace Setup
Setting up your work area is the initial step. Pick a very much ventilated region with a level, stable surface. Cover the surface with a plastic sheet or paper to shield it from spills. Accumulate every one of your materials: silicone elastic, impetus, blending cups, mix sticks, your unique model, and a mold box or compartment.
- Safety Precautions
Security is vital while working with silicone. Continuously wear defensive gloves and eyewear. Guarantee your work area is very much ventilated to try not to breathe in vapor. Keep a fire douser close by on the off chance that you will be dissolving wax later on.
- Cleaning and Preparing the Original Model for Molding
Your unique model can be any article you need to duplicate in light structure. Clean the model completely to guarantee no residue or trash slows down the embellishment cycle. If your model is permeable, seal it with an unmistakable acrylic splash to keep the silicone from saturating it.
- Applying Mold Release Agent to the Model
Apply a mold discharge specialist to your model. This step is vital as it permits the silicone mold to be handily taken out from the model whenever it’s restored.
Mixing and Pouring Silicone
- Measuring the Silicone and Catalyst
Measure out the silicone elastic and impetus as indicated by the maker’s guidelines. Ordinarily, the proportion is 10:1 silicone to impetus, however this can change.
- Mixing the Silicone Compound and Catalyst Thoroughly
Blend the silicone and impetus completely until they are completely joined. Be mindful so as not to whip the combination, as this can present air bubbles.
- Pouring the Silicone Mixture Over the Model
Gradually pour the silicone blend over your model, beginning from the absolute bottom and moving up. This technique assists with staying away from air bubbles.
- Removing Air Bubbles
After pouring, tap the sides of the mold box to help any air bubbles ascend to the surface. A few crafters likewise utilize a vacuum chamber for this step.
- Allowing the Silicone to Cure
Allow the silicone to fix. This interaction can take anywhere from a couple of hours to two or three days, contingent upon the sort of silicone and the ecological circumstances.
Removing the Mold
- Checking for Complete Curing
Before demolding, guarantee the silicone is relieved. It ought to be firm to the touch and not tacky.
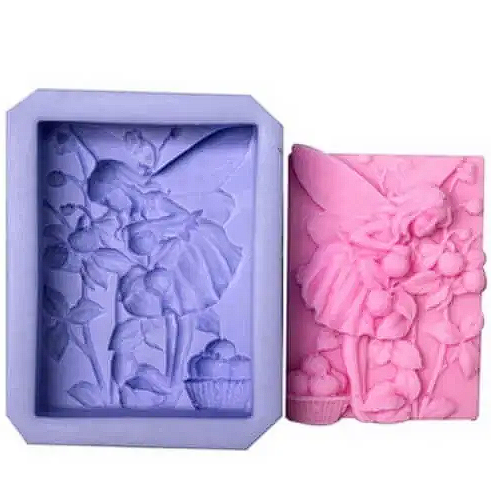
- Cautiously Demolding the Silicone mold from the First Model
Cautiously eliminate the silicone mold from the model. Begin at the edges and gradually strip the mold away, taking into consideration not tearing the silicone.
- Investigating the mold for Any Demoldities or Flaws
Investigate your mold for any demolition or flaws. Little air pockets or slight inconsistencies won’t influence the last light, however, enormous imperfections might expect you to begin once again.
- Trimming Excess Silicone if Necessary
Utilize a sharp blade to manage any overabundance of silicone from the mold. Be mindful so as not to cut into the mold cavity.
Making Candles with Silicone Molds
- Preparing the Mold for Candle Pouring
Before pouring, put your mold on a level surface and secure it so it won’t spill. If your mold doesn’t have an implicit opening for the wick, make one utilizing a stick or comparative device.
- Setting Up the Wick in the mold
String your wick through the opening in the mold, leaving sufficient length at the two closures. Secure the top finish of the wick with a wick holder or clothespin to keep it focused.
- Dissolving the Flame Wax
Dissolve your flame wax in a twofold kettle, blending at times. Never leave dissolving wax unattended, as it can undoubtedly burst into flames.
- Adding Colorants and Fragrance Oils (if desired)
When the wax is liquefied, you can add colourants and aroma oils. Mix completely to guarantee even dissemination.
- Emptying the Wax into the mold
Gradually empty the liquefied wax into the mold, being mindful so as not to spill over the mold or dislodge the wick.
- Permitting the Light to Cool and Cement
Allow the light to cool and harden. This cycle can require a few hours or even for the time being, contingent upon the size of the flame and the room temperature.
- Demolding the Finished Candle
When the flame is totally strong, cautiously eliminate it from the mold. Trim the wick to the proper length, and your custom-made flame is prepared to utilize!
Final Words
Making your silicone light mold is a tomfoolery and inventive strategy. With just the right amount of training, you can make extraordinary candles that mirror your style and make incredible gifts.