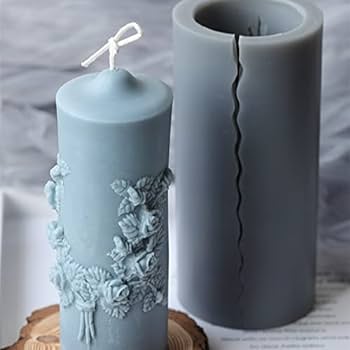
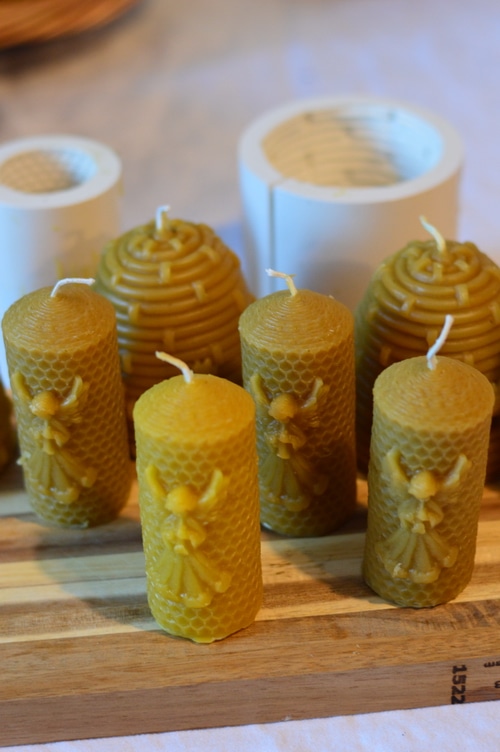
Silicone molds, known for their flexibility and variety, are a game-changer in crafting unique candles. They offer an easy and creative way to bring your candle visions to life. Whether you’re aiming for simple elegance or intricate designs, silicone molds have got you covered. Let’s embark on this illuminating journey and learn how to make a stunning candle using a silicone mold!
Can you make candles in silicone moulds?
Yes! Silicone molds are great for making candles. They’re flexible, which makes it easy to remove the hardened wax. Before pouring, ensure the wax isn’t extremely hot to avoid damaging the mold. Also, secure the wick in place, either with a stick across the mold’s top or with adhesive. Once the wax cools and hardens, gently push the candle out. Enjoy your uniquely shaped candles thanks to the versatility of silicone molds!

How to make a candle using a silicone mold?
Making candles at home can be a delightful hobby, and using silicone molds allows for creativity to truly shine. Silicone molds come in a variety of shapes, sizes, and designs. If you’re eager to craft a unique candle using a silicone mold, here’s a step-by-step guide to getting you started.
1. Gather Your Materials
- Silicone mold of your choice
- Wax (paraffin, soy, beeswax, or a blend)
- Wick (ensure it’s longer than the mold’s depth)
- Melting pot or double boiler
- Thermometer
- Fragrance or essential oil (optional)
- Dye (optional)
- Stir stick
- Wick holder or chopsticks
2. Prepare Your Workspace
Safety first! Lay down newspapers or wax paper on your work surface. This makes cleanup easier and protects your table. Keep your materials within reach. Make sure your space is well-ventilated, especially if using fragrance oils.
3. Melting the Wax
Using a double boiler or melting pot, begin to melt your chosen wax. Monitor the temperature with a thermometer. Different waxes have varying melting points, but most will melt between 170°F to 180°F. Stir occasionally for even melting.
4. Adding Color and Fragrance
Reduce the heat after the wax has completely melted. If you want a colored candle, now’s the time to add your dye. Start with a small amount and increase until you reach the desired shade. Stir thoroughly.
If you’re adding fragrance or essential oil, do so after coloring. Add the oil bit by bit, stirring consistently, until you achieve the desired strength.
5. Prepare the Silicone Mold
While the wax cools slightly, get your mold ready. Silicone molds are generally non-stick, but you can lightly spray the inside with a mold release if desired. Thread the wick through the mold’s bottom until it reaches the top. Use a wick holder or chopsticks to keep the wick centred.
6. Pouring the Wax
Once the wax temperature drops to around 130°F to 140°F, it’s time to pour. Slowly and carefully pour the wax into the silicone mold. Ensure the wick remains centered. Pour up to about half an inch from the mold’s top to create a smooth candle base.
7. Letting It Set
Allow your candle to harden. This process can take several hours to days, depending on the wax type and mold size. For best results, let it set in a cool, undisturbed spot. Avoid moving the mold, as this can create imperfections in the candle.
8. Removing the Candle
Silicone molds are flexible, making candle removal easy. Once fully set, gently pull away the mold’s sides to break the air seal. Flip it over and nudge the bottom. Your candle should slide out effortlessly. If there’s any resistance, give it more time to set.
9. Finishing Touches
Cut the wick to about a quarter-inch long. If the candle’s base isn’t level, you can smooth it by briefly placing it on a warm skillet or pan.
Using silicone molds offers a fun and creative way to craft candles tailored to your style. Whether you’re making candles for personal use, gifting, or even selling, this method ensures a unique product every time. The flexibility of silicone molds, combined with your imagination, makes the possibilities endless.
How to use a Silicone candle mold?
Silicone candle molds are the unsung heroes of the candle-making world. Flexible, durable, and available in a plethora of designs, they can make your DIY candle-making experience both joyful and rewarding. If you’re new to this or simply need a refresher, let’s walk through the process of using a silicone candle mold.
Understand the Benefits of Silicone
Silicone molds stand out due to their flexibility. This elasticity makes demolding a breeze. Additionally, silicone is heat resistant, ensuring it doesn’t get damaged with warm wax. Lastly, the variety of shapes and designs available is truly unmatched.
Prepping Your Mold
While silicone is naturally non-stick, a light spritz of mold release ensures an even easier release later. It’s a quick step that can make a difference, especially with intricate designs.
Secure the Wick
Every candle needs a wick. For silicone molds, you typically enter the wick from the top (which becomes the candle’s base). Thread your wick through any pre-made hole, ensuring it reaches the mold’s bottom. If there’s no hole, you can create one using a skewer or similar tool. Secure the top end of the wick with a wick holder or chopsticks, ensuring it stays centered.
Preparing Your Wax
Melt your chosen wax using a double boiler. While it’s melting, monitor the temperature with a thermometer. Different waxes have distinct melting points, but a range between 170°F to 180°F works for most.
Add Colors and Scents
Once melted, you can add colors and fragrances to your wax. Dyes come in liquid, block, or powdered form. Stir the dye in until you achieve your desired color. For scents, add fragrance or essential oil after the color, stirring well.
Pouring into the Mold
Before pouring, ensure your wax’s temperature drops to around 130°F to 140°F. This cooler temperature helps in reducing air bubbles. Carefully pour the wax into the mold, keeping the wick centered. Pour slowly to avoid creating unnecessary bubbles and ensuring the mold fills evenly.
Patience is Key: Let it Set
Resist the urge to touch, move, or demold your candle too soon. Allow it to solidify fully. Depending on the wax and mold size, this could take anywhere from several hours to a couple of days. A cooler setting environment helps in achieving a smoother finish.
Demolding the Candle
The beauty of silicone molds lies in the demolding process. Gently pull the mold away from the hardened wax to break any air seal. Then, turn the mold upside-down and press gently on the base. The candle should release smoothly.

The Final Touches
With your candle out, trim the wick down to a quarter-inch. Check the base of your candle. If it’s uneven, you can carefully melt the base on a warm skillet to level it.
Silicone candle molds truly simplify the candle-making process. Their flexibility, combined with the sheer variety of designs available, opens the door to endless creativity. Whether you’re crafting candles for personal use, as heartfelt gifts, or even as a business venture, mastering the use of silicone molds will surely light up your crafting journey.


